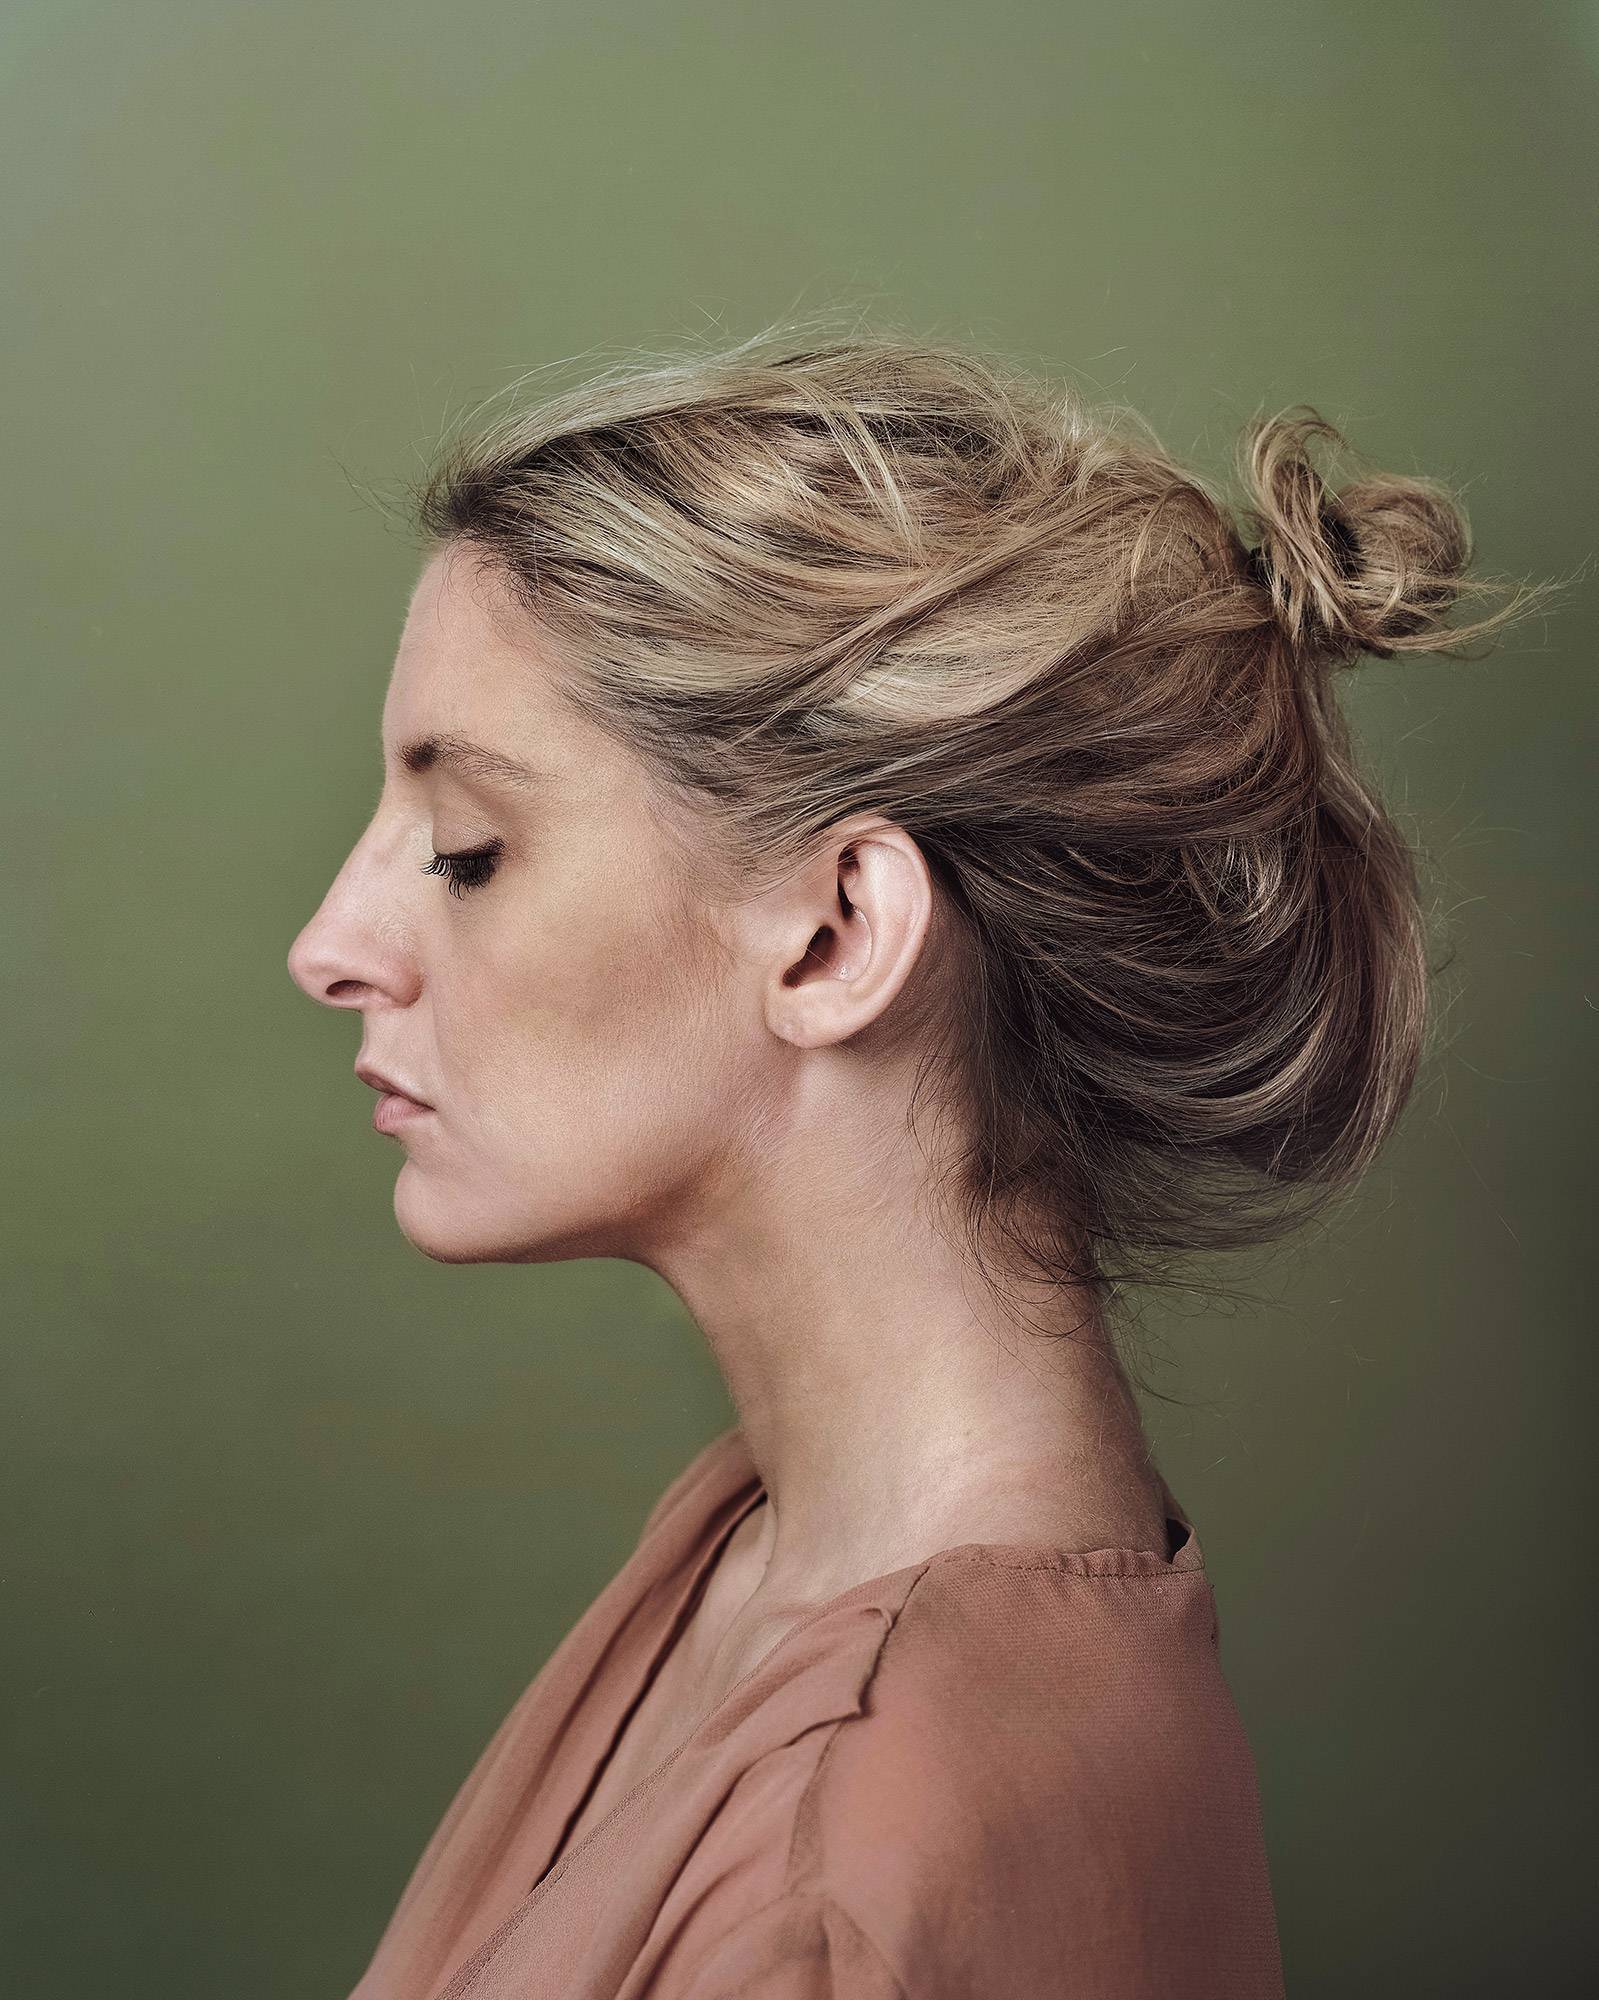
I love shooting portraits on sheet film. They have a lovely smooth tonality and uncanny depth to them. A classic style that makes anyone look fantastic.
Large format cameras can seem intimidating . In reality, a view camera is actually a very straightforward device. It has same basic controls as any other camera, focus, aperture and shutter. The camera came seem old fashioned compared to a modern DLSR, but it can produce results that can’t easily be copied by a digital camera. Large format cameras have many controls that a standard digital camera doesn’t. Develop you skills and you can use these to your benefit. These are my tips for making great large format portraits.
Lens Selection
Lens selection for large format is not quite as straightforward as it is with other formats. Although you can fit almost any lens on to almost any camera in theory, the reality can often be more complicated. Longer lenses (240mm +) can often be big and heavy and require a lot of bellows extension for portraits. On top of that, they generally come in large No.3 shutters which only have a fastest shutter speed of 1/125, and because they work on 8×10 cameras, they often are more expensive too.
For all of these reasons I would recommend a 210mm 5.6 lens as your first portrait lens. They are relatively cheap, plentiful and easy to use. They can be focused to portrait distances with any camera that has 300mm of bellows extension (which is the vast majority of view cameras) and are not so heavy as to make lighter field cameras unstable. Any modern lens from the major manufacturers (Schneider, Rodenstock, Fuji or Nikon) will be an excellent performer.
Have a Shot List and shoot your film sensibly.
Using a view camera is a deliberate process, and there is less room for spontaneity than if you were shooting a smaller format. Portraits tend to be more formal. Personally, I prefer to work from a plan. I have a list of poses I want to shoot. I work on getting my sitter into the pose I want and then I make two negatives of that picture.
Large format portraiture is a medium that favours photographers who direct their sitters well. Film costs can soon mount up if you don’t have a plan. You can’t shoot away hoping for a bit of magic or that lucky shot. You have to make your own magic. Having a shot list is a great way to make sure you don’t overshoot or repeat things you don’t need to. I find the one set up/two shots works well for me and allows me to cover a lot of ground without spending huge amounts on film and processing every shoot.
Make Conversation as you make your portraits.
Making large format portraits is a leisurely process. Setting up can be slow, so it’s really important that you keep your subject at their ease, and being a able to chat away while you set up the camera is an important and underrated skill. Using a view camera can help as it is a real conversation piece. When I have approached people to take their photo I find that the vast majority are interested in the camera, and interested to know about the process. So it’s easy to keep them engaged, and to prepare the camera at the same time.
Use a Posing Stool for Headshots.
Slim depth of field is your greatest enemy and your greatest ally in large format photography. For any type of close up portrait, it is imperative that your subject stays in the same plane of focus, from composing on the ground glass to loading the film holder and tripping the shutter. I have found that a tall stool is the simplest way of keeping things steady. People sway when they are standing, and it only takes a movement of a few centimetres to ruin your shot. A stool solves this problem easily, and makes life more comfortable for your sitter.
Stop down your lens.
As mentioned above, large format lenses wide open have razor thin depth of field. F5.6 equates to f1.2 in full-frame digital. While portraits shot wide open can look stunning, they can be very hard to pull off consistently when you start out. They can also be very tough on your sitter. It makes more sense to start out at more conservative apertures and build you skill level.
For environmental portraits widest aperture I will shoot at is F11, and given the choice I’ll shoot at F22. There are several reasons why I do this. The main one is that people can move slightly between when when you focus on the ground glass, and when you load the film and take the shot. There is no way to check focus once the film is loaded, so you have to either give yourself a bit of leeway, or accept a certain number of not *quite* in focus shots.
Even at f22 the depth of field at head shot distances is 8cm. The background will still be blurred. Moreover, most large format lenses were optimised for f16-22 so by stopping down you will be using your lens as it was designed to be.
Use a fast film.
Stopping down has its side effects. We get more depth of field and lenses working at their best, but the flipside is we get slow shutter speeds and if we are using flash, we need more output. Using 400 iso film helps minimise these problems. The best fast films like HP5, Portra 400 or Tmax 400 still have minimal grain in sheet sizes, and means that you only need a quarter of the light you would need shooting 100 speed film at the same settings.
Take Notes.
There is no EXIF data or LCD screens with film. For that reason it is vital that you keep notes so you know what works and what doesn’t. the shutter speed and f-stop you used is the bare minimum but it is also incredibly useful to number your holders and assign them to each set up. That way you can trace what’s on your negatives for the tip below!
Shoot two copies of each shot and develop them separately.
One of the great benefits of large format is that you can process each sheet separately. When I shoot portraits I use each film holder to shoot one set up. I always try to shoot two near identical shots. I then split the shots in processing so both go into different batches. That way if there is an exposure issue I can changes the development for the second sheet, and if I make a mistake in processing I still have another go to get it right!
Invest in a good quality Loupe.
Although it is definitely possible to start with a cheap plastic loupe, you will save money in the long run (not to mention avoid a lot of heartache) if you invest in a good quality loupe. I use an 8x nikon loupe that I bought cheaply second hand. Originally, I used a 4x Schneider loupe, but I found his wasn’t quite strong enough for critical focusing at closer distances. Cheaper plastic loupes make the whole focusing process very uncertain. I doesn’t take long for wasted film to far outstrip the cost of a decent loupe.
Be Prepared to Break these Rules.
These tips are just a starting point. Things I wish I had known when I started shooting portraits with my view camera. As you gain experience, I hope you develop the confidence to create your own rule book and you own methods. So that you can express yourself through the magical medium that is film.
More Large Format Articles
A beginner’s guide to the large format film camera
How to load a large format film holder
Using a large format camera for the first time
Choosing film for your large format camera
Follow me on instagram to see my latest work
8 thoughts on “Beginners Guide for Shooting Portraits on 4×5 Film.”
Very informative article! I recently purchased an intrepid camera and would like to start off shooting portraits. I pretty much have everything except a loupe which I’ll be purchasing asap. I’ve been undecided whether to buy a 4x or 8x but I’ll probably go with an 8. Thank you again for the great article!
Thanks Chris!
When you buy your loupe be sure that the magnification isn’t too strong or you’ll find the grain of the ground glass quite distracting. I have a x4 and a x7 loupe and prefer the x4 for any focusing that isn’t too challenging. The other option that some people like is to buy some cheap supermarket reading glasses so you can inspect the ground glass close up under the dark cloth.
Went in search of some information on large format portrature technique and came upon your article. I must say worth the time spent reading. Straight forward, to the point with just the right amount of caution.
In particular I found the practicality of shooting two frames of the “same” shot and separating the processing; is something I will definitely put to use.
Thanks you for sharing.
Thanks Devon! I’m glad the article helped you.
What lens did you use for that top photo? And was it stopped down? Thank you sife
It was a Schneider 210mm APO Symmar probably at f11
Awesome, thanks Tobias. Everything important is in focus. It’s a really beautiful portrait. I’m curious what you think about DoF – with portraits like this, the equivalent in full frame perspective would be something like 50-60mm and f2.8 or so. Is there a look that goes beyond the bokeh, so to speak, with large format? Is it the film or the lenses themselves? It looks very noble and clean.
Curious what your lighting set up looked like here too.
Love the photos.
Hi Jacob
I think the thing to remember about large format is that the way the camera operates and the constraints it places upon you has a big effect on the final result. The result is defined by the process in a more significant way than smaller formats. This image is probably equivalent to a 65 or a 70mm lens at 2.8 on full frame, but because you are using the lens at close to its optimum aperture, the sharp bits are really sharp.