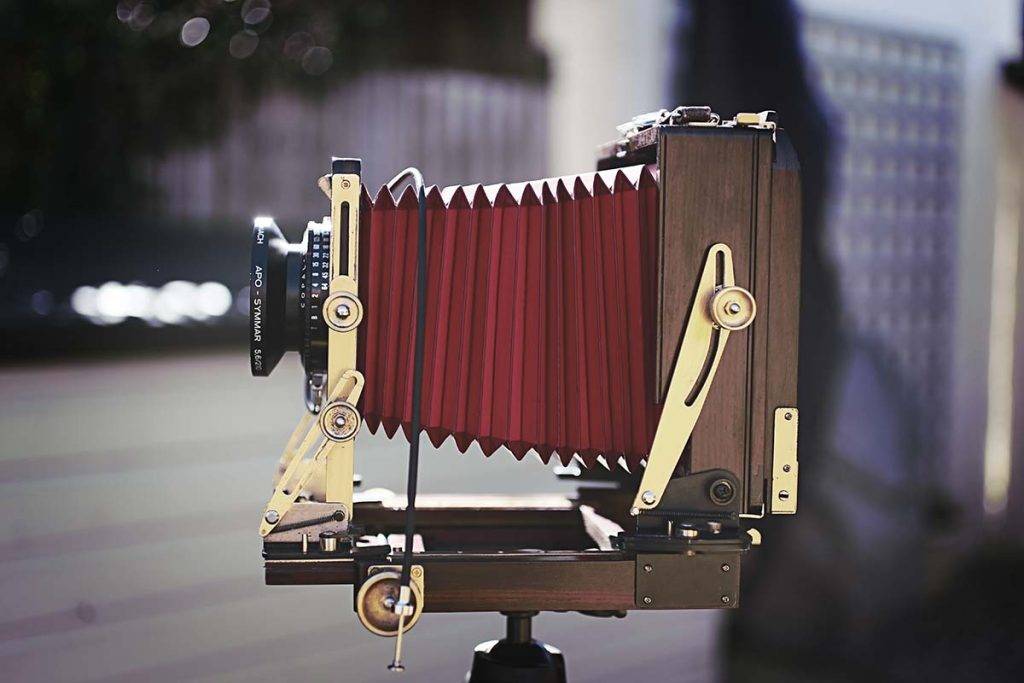
Learning how to use a large format camera can seem a bit daunting if you are accustomed to using a modern digital camera. There is no automation to help you, and the layout and variety of controls is very different from what most photographers are familiar with. In reality, there is nothing inherently difficult about making a photograph with a large format camera. You just have to be a bit more patient and a bit more methodical. The main differences are in the ergonomics and speed of operation, the principles of photography stay the same, whatever the camera.
Before you Start
Large format requires quite a lot of equipment in addition to the camera, so it’s a good idea to have a checklist of all things you need. Especially if you share some of that equipment with other set ups. It’s easy to forget something like your loupe or dust blower, and it’s a real pain if you do.
I have also written a guide to loading large format film holders
My Basic Large Format Checklist
- Camera
- Lenses as Required
- Tripod
- Light Meter
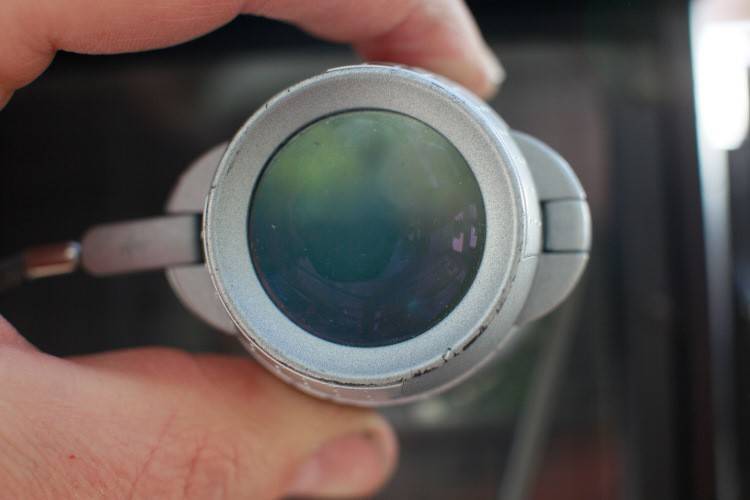
- Magnifying Loupe
- Cable Release
- Film Holders
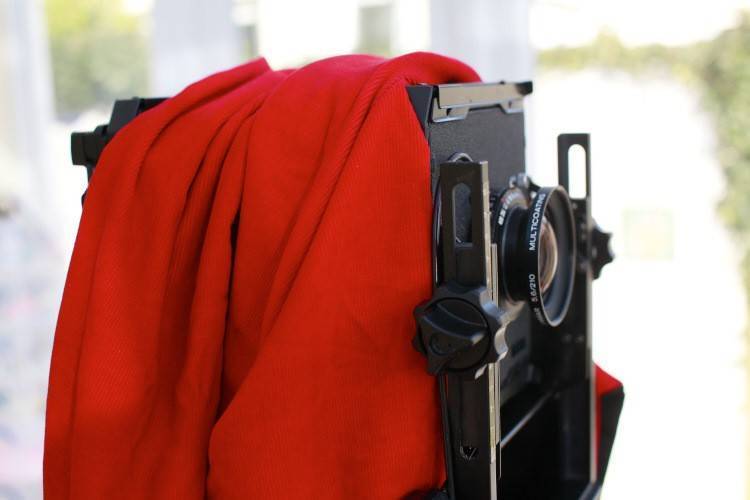
- Dark Cloth
- Blower brush and Lens Cloth
- Notepad and Pen
- Multi Tool (for loose screws or allen keys)
You can keep your list in your camera bag so you can get into the habit of checking everything before you go. I keep mine on my smartphone, along with an app for depth of field calculation, and one that works as a light meter. A handy back up in case I forget my handheld meter.
Money Saving Tips
Professional darkcloths can be quite expensive, so a way to make one cheaply is to take a black T shirt and attach it to the camera with the neck hole.
If you don’t have a loupe a pair of strong supermarket reading glasses can work well and are surprisingly good quality
Camera Controls
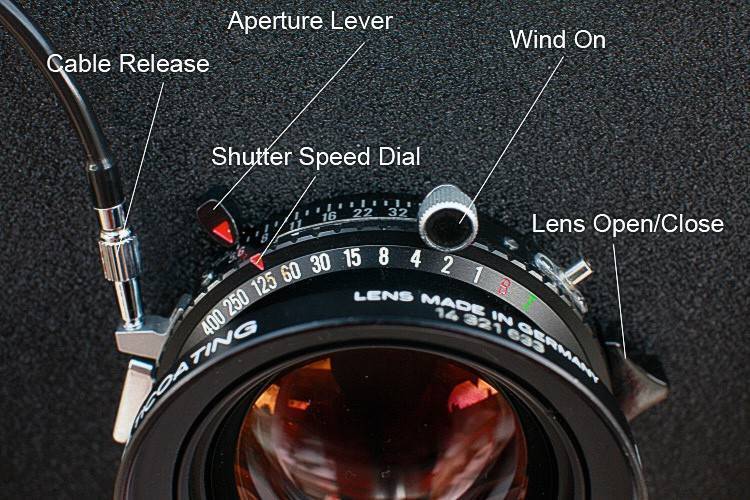
Your main camera controls are all on the shutter that the lens is fitted to. This is a modern Copal No.1 shutter, but most shutters made over the last 50 years have a similar layout. Never adjust the shutter speed after cocking the shutter!!
Your only two exposure controls are shutter speed and aperture, ISO is governed by your film choice, and set on your light meter. Your film holders should be labelled by film type and speed for reference.
Making your First Large Format Photograph – Step by Step.
Step 1. Setting up your tripod
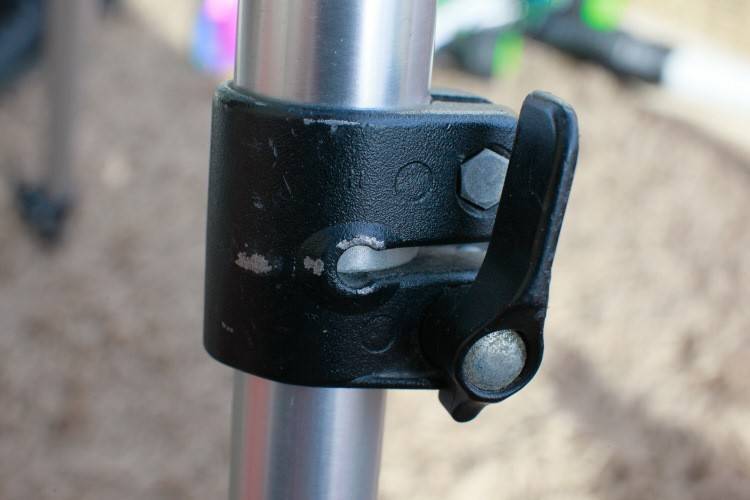
Set up your tripod, making sure all the legs are locked in place. Fix your camera to the tripod, and attach a lens. Fully open up the aperture on the lens. Screw in your cable release to the shutter.
Large format photography is all about detail and resolution. Make sure that you have a stable tripod to shoot with. Nothing is more frustrating than sharpness-robbing vibration ruining your shots.
Step 2. Level your Camera
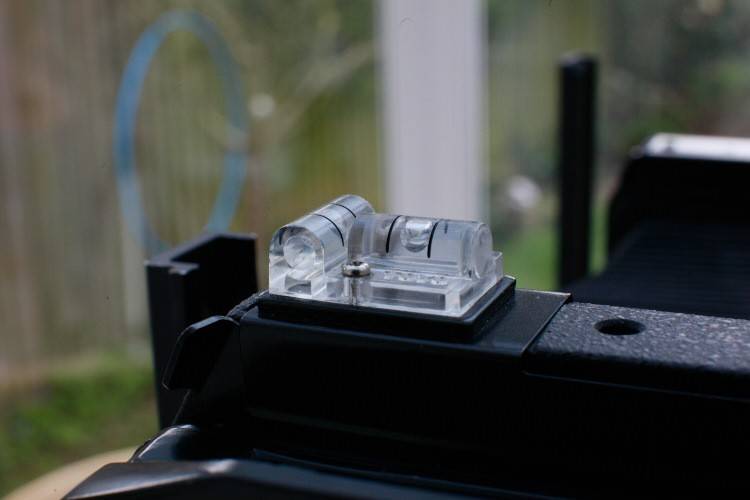
Using the spirit levels on the camera to make sure it is perfectly level – vertically and horizontally.
It’s best to start off with a straight and level camera, making sure that all tilts, swings and shifts are also zeroed. Many cameras will have detents on the main camera controls so the zeroed settings will just gently click into place. If the camera doesn’t have detents on some controls, there are usually little arrows to line up instead. 4×5 has very shallow depth of field, so an inadvertently tilted or swung standard, or a camera that is not level can give you strange focus issues. It’s much easier to start with everything parallel and perpendicular. Also make sure that once you’ve zeroed the camera you lock off all the controls. That way you won’t get tilts or swings moving while you focus or vice-versa.
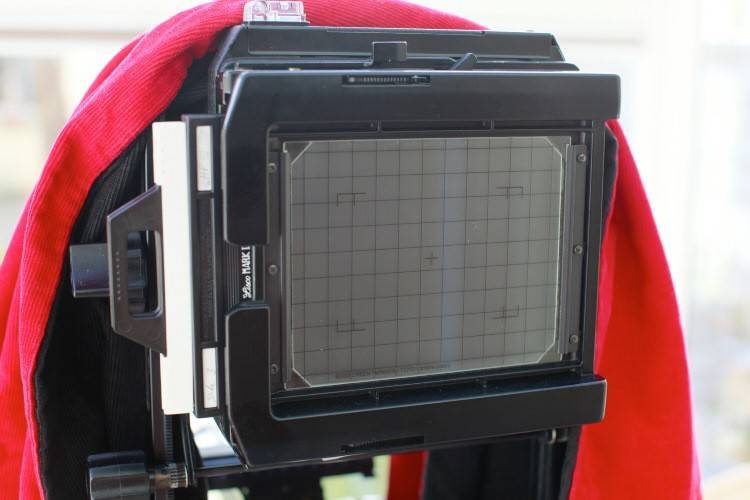
Step 3. Initial Focus and Composition.
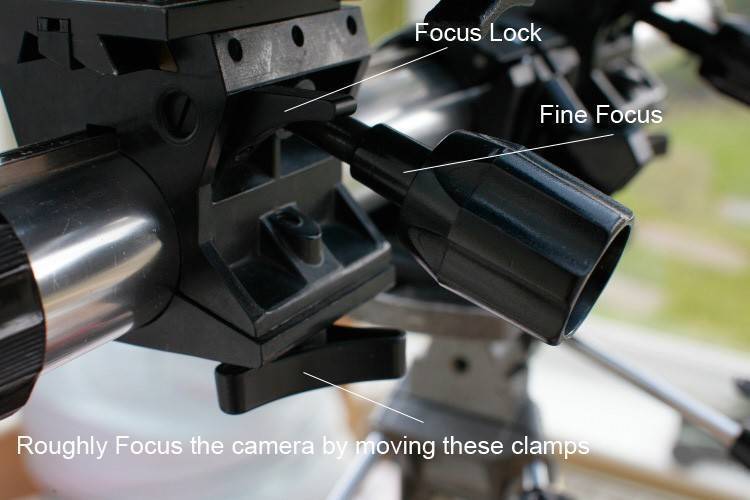
Use your dark cloth and focus the camera by eye. You don’t have to use a magnifier until later. Then begin to compose the picture using the ground glass.
Remember, you can use rise, fall or shifts to refine your composition. You don’t have to move the tripod unless you need to change your point of view drastically.
Step 4: Fine Focus and Check Depth of Field
Once you have set up your camera either focus on your subject, or if you are photographing a landscape a good starting point is to focus about one third of the way into the scene. Now is the time to stop down the lens. The normal working apertures on 4×5″ are between f16 and f32. This may seem small compared to full frame but diffraction in 4×5 isn’t really noticeable until f64.
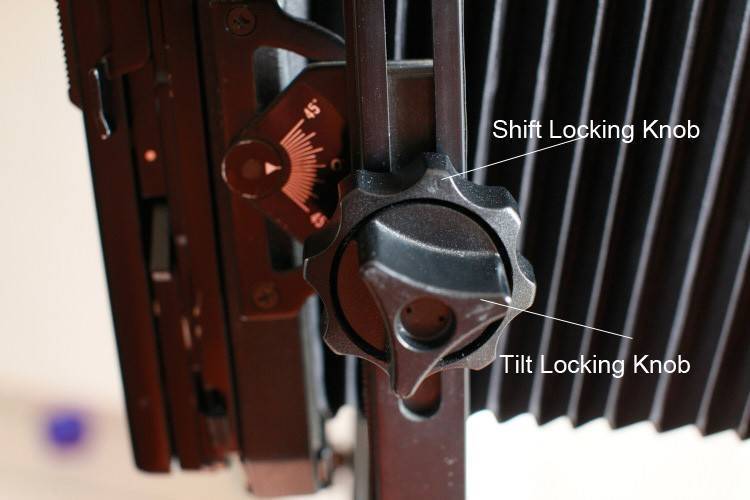
It is at this point you would use tilts and swings to maximise depth of field if stopping down by itself isn’t enough. Tilts and swings are not that difficult, but would take up too much space to deal with them here. Follow this link if you want to know more about camera movements. For now let’s assume you don’t have to use them. Once you are happy with focus check the corners of your image to make sure there is nothing creeping into the edge of frame. One of the beauties of a large format camera is you can compose your images very precisely, so make sure you take advantage of it.
Step 5. Lock Down the Camera
Once you are happy with your focus and composition, lock down all the controls on your camera. Ideally, you should lock each control after you have finished adjusting it. That way you don’t inadvertently move any controls while adjusting something else. In practice, you may find yourself adjusting a couple of things at once, like tilt and focus. In that case, lock both down together once you have finished.
Step 6. Final Meter Reading. Set Aperture and Shutter. Close Lens.
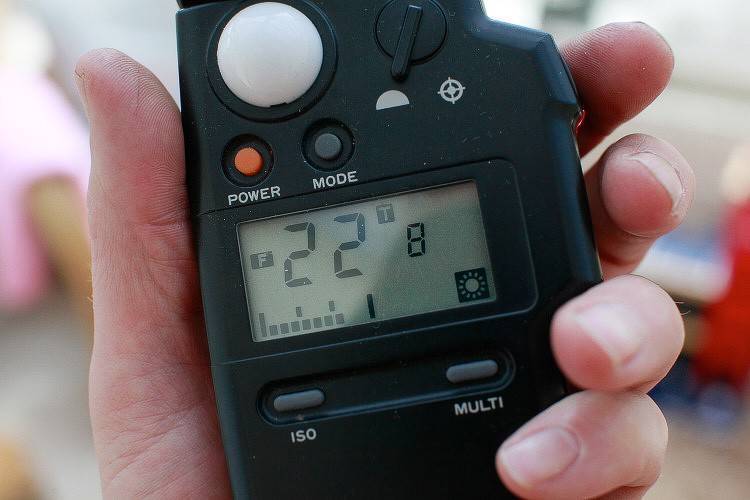
Take a meter reading and make your final shutter speed and aperture selection. I tend to do this quite late on because I live in the UK and the light can vary quite a lot with shifting cloud cover. Remember you can damage the shutter if you change the shutter speed when it is wound on, so always check before selecting your shutter speed. Once you have done this close the shutter so the camera is light tight and ready to receive a film holder. It is a good habit to test fire the shutter a few times at this point, just to warm up the mechanism and check everything is working.
7. Insert Film Holder. Remove Dark Slide. Trip the Shutter.
Take out you film holder and remove any surface dust with your blower. You can also tap the bottom of your holder onto the palm of your hand to dislodge any dust on the film. It should fall to the bottom of the holder. Insert your film holder gently. Your camera should be locked down, but it’s best to err on the side of caution in case something moves. Double check that the lens is closed and the camera is light tight. Remove the dark slide while keeping your thumb on the back of the spring back so you don’t open it inadvertently. You are now ready to expose the film.
Use the cable release to trip the shutter in one smooth stroke. As an extra precaution some photographers stand slightly away from the camera to avoid causing any vibrations. If you are a portrait photographer sometimes standing behind the camera can help you judge the correct moment of exposure. Once you have tripped the shutter carefully reinsert the dark slide with the black (exposed) tab facing out. Put the holder somewhere safe and then check the ground glass to see that focus hasn’t shifted. At this point many photographers make another duplicate exposure for safety. That, of course, is up to you.
Congratulations, you have just made your first large format photograph!
If you have found this tutorial useful please share it and help keep film alive.
How to load a large format film holder
A beginners guide to the large format film camera
Choosing film for your large format camera
13 thoughts on “How to use a Large Format Camera. A step by step guide for beginners.”
Can one use a monorail 4×5 in the field, or is it just impractical.
I have used one in the field. I set it up at my car and then hump it around on a tripod. It’s not ideal but you can definitely do it.
Thanks for your tutorial!!! Very practic!
This is incredibly helpful, Tobias. Thank you.
Could you recommend a really good LF portrait lens? One that is not to tight …I like the subject to breathe.
Hi Geoff, most people seem to use a 210mm for portraits, which is around a 70mm equivalent in full frame digital. I personally have a 210mm F5.6 APO Symmar which is one of the best lenses I have owned in any format. All of the big four lens makers make similar lenses and they are all very good. It’s probably most important to make sure you get one in a modern copal or compur shutter. The later shutters are all black.
Absolutely love this article. I’ve been hunting around looking for Large Format information, like the basics for ages and not really found much other than Forums, which didn’t really help.
I’m keen on experimenting with Large Format lenses with a Nikon D850 35mm back — I know it’s not quite the same, but I thought it could be an inexpensive learning tool, especially with Live View before I commit to film.
However, I get confused with the focal lengths and conversions; you mentioned 210mm on Large Format is about 70mm in 35mm terms, is there some sort of calculator you can recommend? Would a 210mm LF lens behave like a 210mm with a digital 35mm back in that case?
Thanks, this is great!
Hi Philip
Welcome to the world of large format photography!
To answer your questions, as a rough guide divide a large format lens’ focal length by three to give its 35mm equivalent. People will argue the toss about whether a 150mm is actually a 45mm equivalent rather than a 50mm but all you really need to know is the 90mm is the most common wide option, 150 the common standard lens and 210mm the popular portrait option. This is based around ease of use as much as it is finding equivalents to 35mm focal lengths. 90mm wides are easier to use than their wider counterparts and have more scope for movements. 210mm is as long as you can go before having to use a lens in a copal 3 shutter, which is big and heavy, perhaps too heavy for a lot of field cameras. To use them with a digital camera the focal length is not divided so a 210mm is a long tele. There are two drawbacks to using them on a dslr. Firstly a lot of large format lenses aren’t that sharp if they are used this way, secondly the sensor in a dslr is recessed back into the body and that compromises what movements you can use, the body will block out light from the lens if you try to use big movements.
You could try a medium format film back as a compromise. The other thing possible is to use back movements to stitch together multiple digital 35mm frames and create a larger format image that way. To be honest I’d just go straight to using film. For what a roll film back or digital adapter will cost you, you can buy 100 sheets of Fomapan. More than enough to get started!
Pingback: How to Load a Large Format Film Holder. - Tobias Key
I’m really interested in learning to use a large format camera, but I’m so intimidated by the whole process. Do you teach in person? Where are you located?
I am based in Chichester in the UK.
I was just about to sell all my 4×5, three lenses, a view finder that filps the photo right side up, and a light meter that meters with a gray card. After reading this article I think I’ll hold on to them for a while.
Thanks for this. I’ve been finding my way with LF photography over the last few weeks, and it is an incredibly rewarding journey. I picked up a Sinar F2 and some accessories for a song and it really is a reminder of the simplicity and the complexity of capturing light wrapped up in one package. I’ve read through your pages, and would make just one suggestion regarding loading film. That is to make sure that the hinged end is in place to receive the cover.
Your pieces have been a good reminder for me that it is vital to build a routine. I don’t want to discover in my lab that I’m developing two unexposed sheets while knowing that means that I’ll likely be developing two double exposures later.
That’s why I’ve bookmarked your page. It is never an harm in my experience to remind oneself of the basics every now and again.
Thanks Niall
Good luck on your 4×5 journey!