
What are large format camera movements and what are they for?
In simple terms, conventional large format camera movements are a way of maximising depth of field in your images without having to resort to very small apertures. Smaller apertures cause diffraction which will degrade overall image quality. In this article we will demonstrate the most simple types of camera movement and the situations you are most likely to use them in. It is not meant as a definitive guide and there is no substitute for experience, unfortunately.
For this article we will just be covering the main movements that are most useful and commonly used. Front tilt, front swing, rise/fall and shift.
Front Tilt
Front tilt is the most commonly used camera movement. Landscape photographers use it to keep the ground in focus from front to back. This is how to do it.
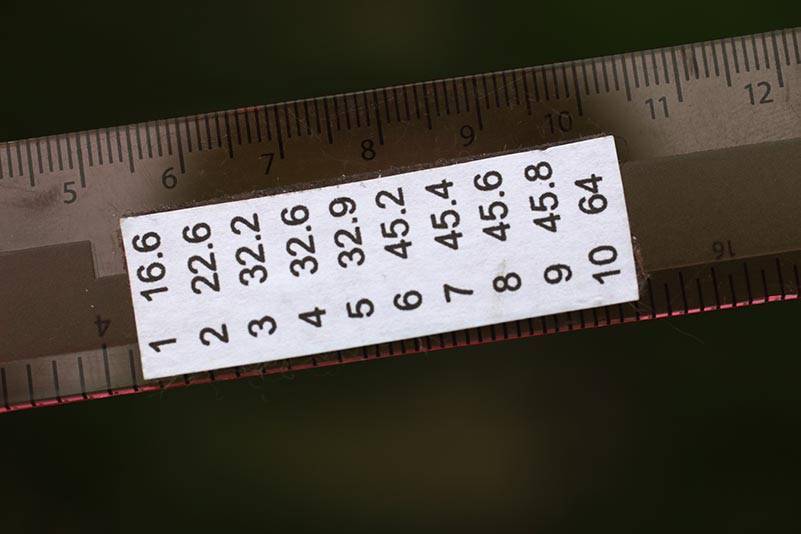
It is easier to get the correct tilt if you use a small ruler with a depth of field calculator scale stuck to it. Follow the link if you want to make your own, How to make a Simple F Stop Calculator for Large Format Photography.
Method
- Set up your camera and frame your shot. Ideally, you want to make sure the camera is straight and level. However, it can be pointing down slightly if you wish.
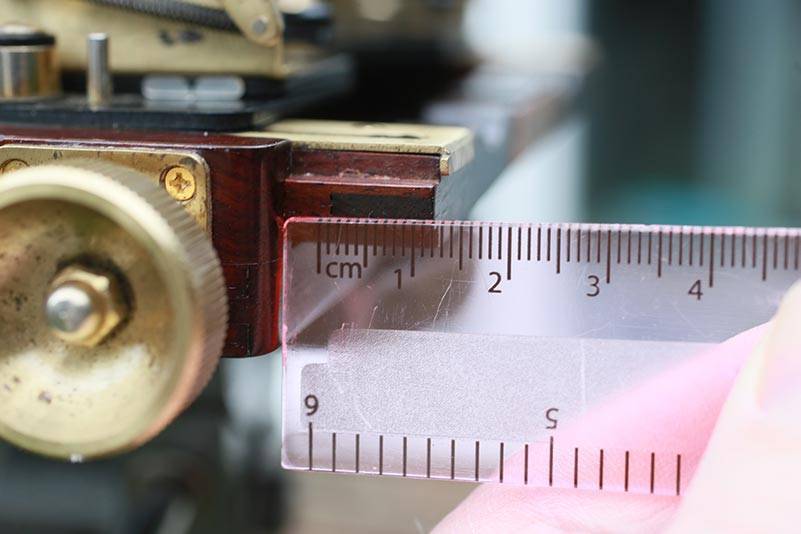
- Next focus at the furthest point in your image you want sharp. At this point, I use a small ruler to measure how far the bed is extended. Then focus at your nearest point and measure again. Use the difference between the two measurements to work out what aperture you should use to get everything in focus with the F-stop calculator.
- If the difference between the two measurements is only 1 or 2mm then you can just stop down to F22 or F32 and set the focus between the two measurements you already made. You don’t need any front tilt in this instance.
- If the difference is greater tilt your lens forward a few millimetres. Focus on the far point then near point again measuring as you go. If you have done it correctly the difference between the two points should have come down.
- Repeat the process until the difference is low enough that you can use your preferred aperture. Then split the difference between the two points, stop down and check everything is in focus. If it is you are ready to shoot!
Things to watch out for
Remember front tilt doesn’t give you more depth of field. It merely matches the depth of field you do have to the subject. That means that if you have a landscape with a tree in the foreground you run the risk of the top of the tree being out of focus if you use too much front tilt.
In practise most front tilt movements are quite subtle. Only a few millimetres in most cases.
In practical application you will need to use tilt and stopping down together to maximise depth of field. Neither is usually enough on its own. Most of my landscape photos are still shot at F22 or F32.
There are two types of tilt mechanism on large format cameras. One is axis tilt, where the tilting mechanism is on an axis through the middle point of the lens. The other is base tilt where tilt axis is at the bottom of the front standard. If your camera has base tilt, tilting the lens changes the focus. So you have to refocus the camera with each increment of tilt and remeasure. You may also have to use some rise to correct the composition as well. Axis tilt does not affect focus in the same way so is quicker to use. Most field cameras have base tilt because it is incorporated into the folding mechanism of the camera
The Scheimpflug Principle and why it can *sometimes* be misleading
Any discussion of using tilt and shift will always lead to some one bringing up the Scheimpflug Principle. Simply put this rule states that to get a photo in perfect focus from front to back the angle of the lens must dissect the the angle between the film plane and the subject plane. This rule is entirely correct of course, but it can be a little misleading in the field. There are several reasons for this.
- Very rarely do we have situations where we need a photo to be in focus from the camera back to infinity. Usually focus needs to start at least a few metres in front of the camera
- The images we make are not flat planes. Trees or people will be perpendicular from that plane. We also need depth of field or a zone of acceptable focus to place our subjects in.
- Lenses do not have infinite image circles, so you can’t use extreme lens movements without running out of coverage.
The Scheimpflug principle can be misleading because it tends to make you think you need more movements that you actually do. Normally lens movements are subtle and used in conjunction with stopping down the lens.
Swing
Swing works the same way as tilt but on the vertical axis of your photo. It is used for things like keeping a fence in focus as moves back through the frame. Another use would be to keep both eyes in focus in a portrait where the sitter is looking out of the frame.
The process is the same as for tilt so I won’t repeat it, but usually easier to do. But you do need to keep an eye on the left and right side of your frame to ensure there are no odd out-of-focus effects.

Rise/Fall and Shift

Probably most widely known as the camera movement to keep verticals straight on a tall building. In my case, I often use them as a way of refining my composition. Once you camera is set up and level it doesn’t make much sense to move the tripod and do the set up all over again. It is far easier to use shift and rise to refine your composition as it doesn’t effect focus or perspective like rotating the tripod head would.
Another use for rise is in portraits. If you set up your camera slightly below your subject and use rise to reframe, you get what is known as a ‘heroic’ portrait. The feeling of looking up to the subject which generates a feeling of grandeur or heroism.
How to use rise and shift.
In most cameras this is pretty intuitive. You just unlock the mechanism and slide in the direction you want. The only thing to be careful of is shifting past the image circle. This will result in vignetting in the corners of the image. So always check the corners of the ground glass before you get ready to shoot.
Things to remember
Although your lens may have a large image circle, it will always be sharpest in the centre. In modern lenses the difference may be negligible, but in older lenses it can be more pronounced. As a general rule of thumb try to minimise movements if you can. So if you think you are going to use a lot of front rise, raise the tripod first before applying shift.
Camera Movements – Conclusion
It can be daunting to use camera movements for the first time. They are something that most photographers will never come across and seem very obscure and technical. The thing to remember is that these adjustments are there to make your life easier, and with practice you will see a noticeable improvement in your images. But remember as with all things large format be methodical and practise makes perfect!
If you would like to know more about large format photography, the large format photography forum is a great place to find more information or ask questions.
5 thoughts on “Camera Movements in Large Format – A Beginner’s Guide”
I enjoyed reading this article describing the most used movements in large format cameras. And your images are fantastic.
Thank you for sharing.
Rgds,
Karl
Thanks Karl!
Thanks for your very professional input.
Beginner here. Referring to your “Swing” discussion and the fence. I thought I needed to keep the camera back and lense both parallel to the fence. That would mean 35 degrees or so of swing for lens and back. Sounds like you only recommend a slight swing… couple degrees, and only the lens?? Clarify your approach, please. Thanks.
The easiest way to think of it is the back of the camera is what you have composed and the front swings are to help you focus the important elements in the scene. But big swings will throw other parts of the scene out of focus, so I prefer to use small apertures and moderate swings to avoid unnatural out of focus areas. But every scene is different so really it’s down to having enough patience to adjust the camera in the field methodically and checking the ground glass until you are happy.