Lighting Can Make or Break a Portrait
This might look like a relatively straightforward shot, but it is trickier than most people think to get a well made portrait out of a large format camera. It needs a combination of careful lighting and a fair bit of technical knowledge to make sure you have the perfect shot. Most of all, there a number of subtle tweaks that turn a good portrait into a great one.
Equipment
- Toyo 5×4 monorail camera.
- Schneider 210mm APO Symmar lens (about a 70mm in 35mm)
- Toyo compendium lens hood to prevent flare.
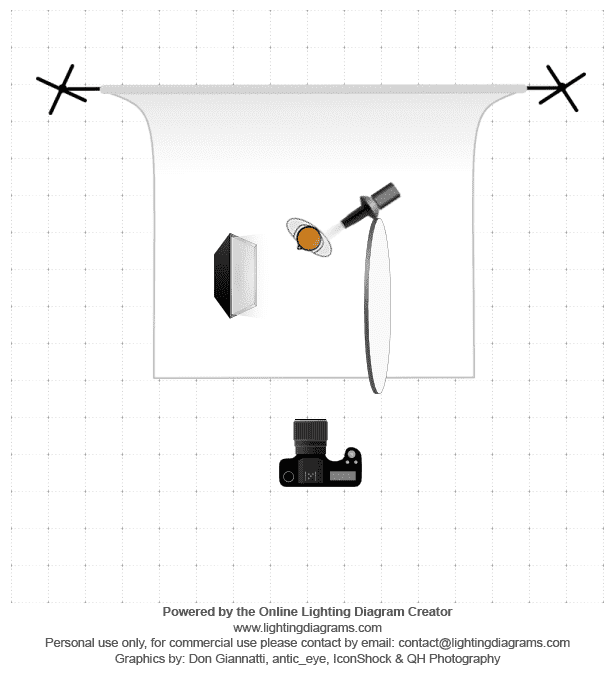
- 2x 500w/s monolights, 1 softbox, 1 snoot.
- Large white reflector
- Grey fabric background stretched across two stands with clips.
- High posing stool.
- FP4+ sheet film.
Depth of Field
The current trend in portraits is to shot with the aperture at, or close to, wide open. There are many very good portraits shot this way. However, it does mean that if your subject isn’t looking directly at the camera one eye will be out of focus, which I find distracting. I prefer to keep both eyes in focus so for this shot I stopped down to f22 (only about f5.6 in 35mm terms). I also used a bit of swing to bring the far eye into the optimum plain of focus.
Lighting
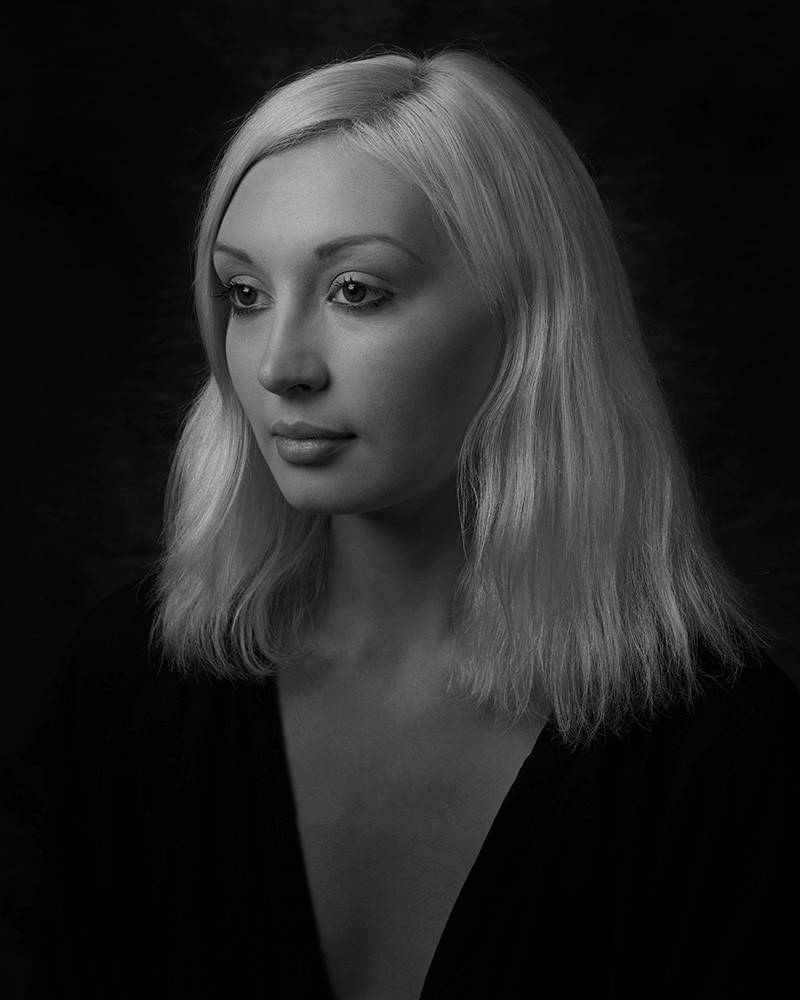
A large softbox camera left is the main light for this shot. I controlled the shadows by bringing the soft box forward. The rear edge of the softbox is in line with Mell’s nose. This way the softbox doesn’t cast a heavy shadow over the right side of Mell’s face. Instead, the light falls away very softly and naturally. The fill is a white reflector bouncing in a little more light camera right. A low-power snoot hair light separates the hair from the background. I try to keep my lighting natural, so fills and hair lights are subtle.
Exposure and Development.

I always follow the old photographers adage ‘expose for the shadows and develop for the highlights’. My aim is to produce a slightly ‘flat’ negative that will scan well and give me plenty of scope in post processing. Loss of shadow detail is the one thing that can really ruin an image. I watch for this more than almost anything else.
This portrait was shot with flash so I took three incident readings. One at the skin highlights camera left, one at the middle of the face and another in the shadow area. My aim is to check that there is a decent amount of separation in these three values. A two to three stop range across the skin would be perfect, and would expose at the middle of these three values. If I had to choose I would rather have lower contrast which I could boost later rather than shadows that are difficult or impossible to print. I was shooting FP4+ and exposed +2/3 over the box speed. Part of that is for bellows extension and the rest is added from testing over an extended period of time. I develop my film in HC110 mixed 1+49 for 11 minutes @20c.
Notes on Testing
I think the shutter on my lens and my meter are accurate, but I have just worked towards settings that work for me. For example, I live in an area with very hard water, which I think affects my developing times. If the water where you live is soft, you’ll get different results. I don’t think anyone else should copy what I do. Always test and come to your own conclusions.
Post Processing
If you look at the middle picture in the processing series, you can see that most of the effort has gone into darkening the shirt and background. One of details that I like is the subtle texture in the background. So, I was careful to preserve some of this. Patterned or painted backgrounds can look tacky if they aren’t used intelligently. One of the great things about larger formats is that the background can be close to your sitter and still blur enough not to look distracting. I slightly darkened the skin tones to make the portrait more moody, and to improve tonality from light to shadow areas on the skin. Tonal transitions in large format are beautifully smooth, and I was very careful to preserve this.
Conclusions
Portraits don’t emerge from my camera perfectly formed and I don’t succeed at the first attempt. This was the third time I had attempted this set up over a few different shoots. Each time I looked at what could be better, what went right and tweaked the set up.
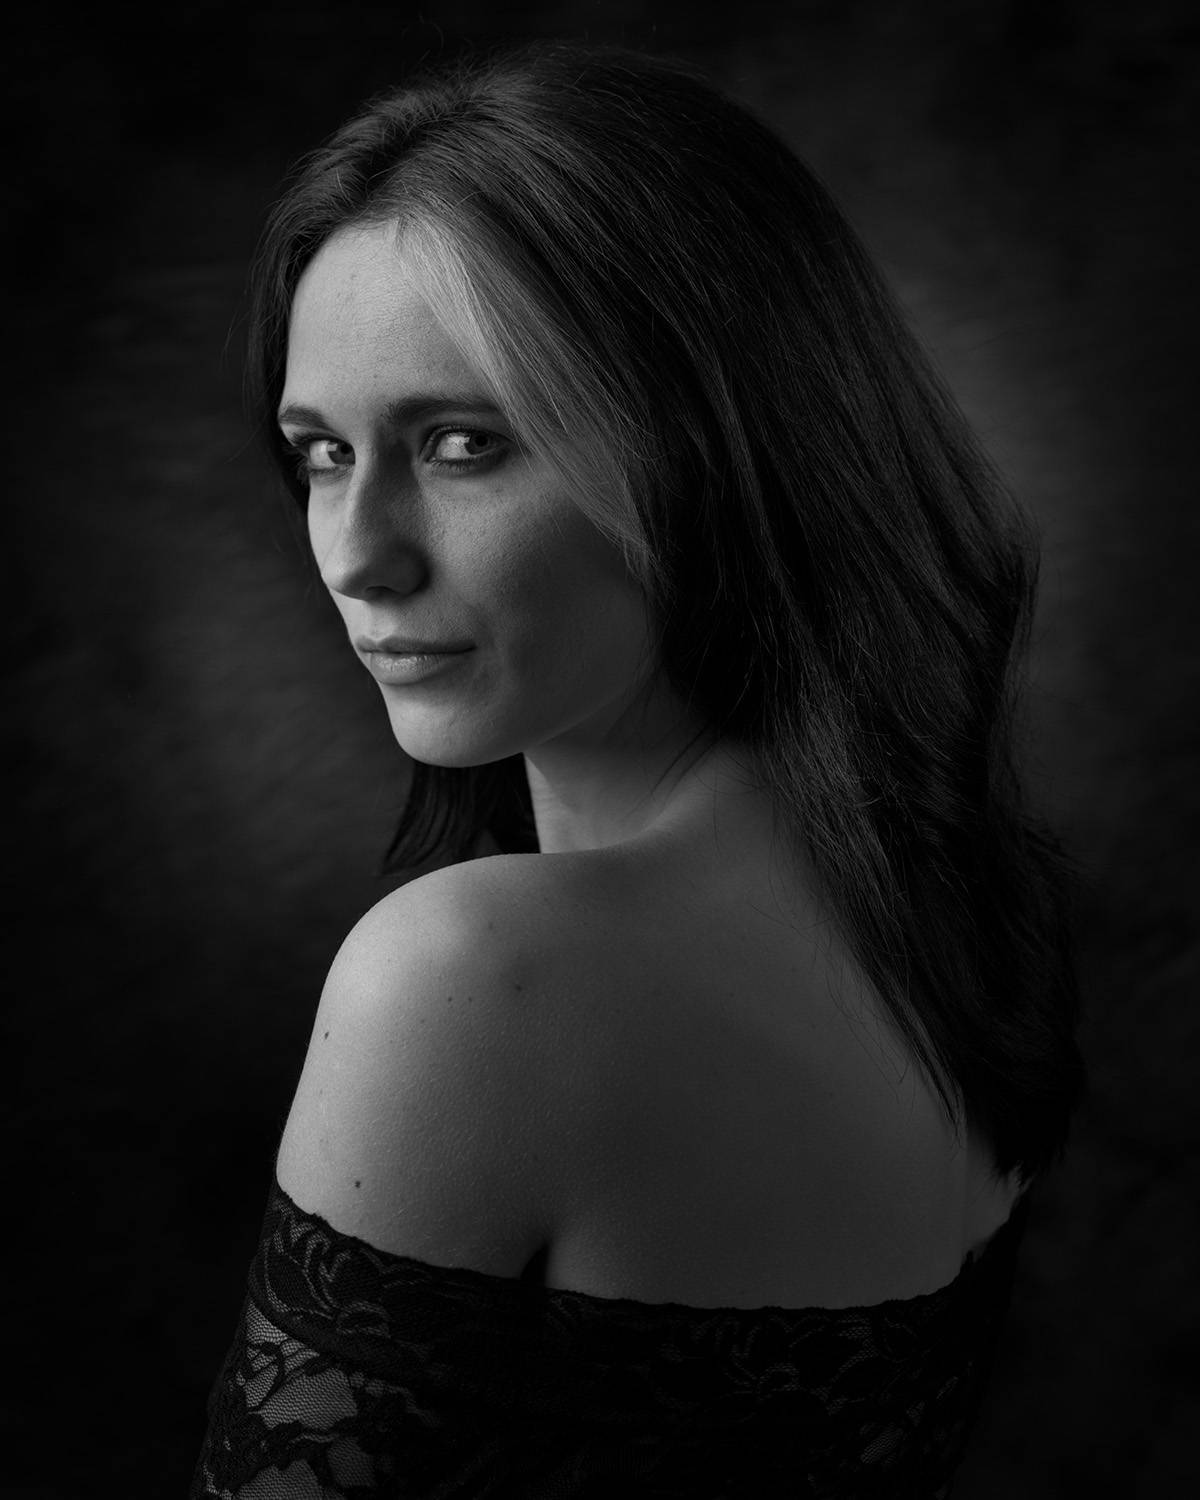
This is an earlier portrait lit in a very similar way. It was after this shot I added a hair light, as I felt the values in the hair were too low. I also put a gridded light onto the background which I felt was a bit too strong afterwards, and looked a little like bad dodging to me. I also filled the shadows on the right side of the face more after this shoot.
The main skill to gain from any analysis of technique is the ability to breakdown and critique your own work so it can be better the next time. It also helps ‘reverse engineer’ other people’s work. This is even more important in analogue photography where errors or missteps directly cost you money in wasted film. I do ‘polaroid’ my shots with a digital camera. However, because film has all it’s leeway in the highlights and digital is better in the shadows, it is not a foolproof system for getting a good negative. The best recipe for improving your work is hard work and evolution shoot-by-shoot, just as it has always been.
Toby
Commercial Photographer Chichester
More information
Large Format Photography Forum
5 thoughts on “Portrait -How I got the Shot – Analogue Studio Photography – Mell”
Pingback: What's in my camera bag - Large Format Photography. - Tobias Key
Pingback: Large Format Article Links - Tobias Key
Pingback: Field Camera vs. Monorail. Which is better? - Tobias Key
Bravo
Thank you so very much! I am starting out with 4×5 and love photographing people. This gives me a framework to get started. Well done…